What to Expect When Following an HVAC Replacement Timeline
Replacing an HVAC system is one of those home projects that looks simple from the outside and gets more nuanced the moment you start pulling on the thread. Most people know the end goal, cooler rooms, steadier temperatures, lower energy use, fewer repair calls, but the route to get there can surprise them. A good HVAC replacement timeline is not just a scheduling tool. It shapes how much disruption you experience, how smoothly the crew works, and how quickly your home gets back to normal once the old equipment is out.
I have seen homeowners assume the job is basically one long day with a few loud hours in the middle. That can happen, but it is only part of the story. The full process usually starts well before installation day, with an assessment of the old system, measurements, equipment selection, permit questions, and some planning around access. It ends after the new HVAC system startup, when the technician checks airflow, verifies refrigerant charge, confirms controls, and makes sure the system behaves the way it should under real operating conditions. The middle is where most of the work happens, and that middle is where expectations matter most.
Why the timeline matters before the first tool comes out
A replacement project moves faster and causes fewer headaches when the timeline is clear from the start. That sounds obvious, but I have watched plenty of jobs go sideways because everyone focused on the equipment and ignored the sequence. The home may need a new condenser, furnace, air handler, evaporator coil, thermostat, or duct adjustment, and each piece affects the others. If the contractor does not map those dependencies early, the installation can stall while someone waits on parts or discovers a mismatch between the old setup and the new one.
The HVAC replacement timeline also matters because it helps you prepare for AC installation in practical ways. You might need to clear a path to the attic, move storage bins, make room around the outdoor unit, arrange time off work, or plan for pets and children while the house is open and technicians are moving in and out. On a simple changeout, those tasks may take less than an hour. On a more involved project, they can make the difference between a smooth install and a day full of delays.
What usually happens before installation day
The preparation phase is where a responsible contractor earns trust. A proper visit is not just a sales call with a clipboard. It should include a look at the existing system, duct layout, electrical setup, drainage, and the condition of the space where the equipment will sit. The technician or estimator should confirm sizing, because replacing a system with the same tonnage is not automatically the right answer. In some homes, the old equipment was oversized, undersized, or simply patched together over time. Correcting that takes judgment, not guesswork.
This phase can take a few days or a few weeks depending on how quickly the quote is approved, whether permits are required, and whether the equipment is in stock. For some straightforward replacements, scheduling the work within a week is realistic. For specialty systems, custom duct revisions, or homes with older electrical panels, the timeline may stretch. That is not necessarily a problem. A slightly longer planning window is usually better than discovering on installation day that the disconnect is not code-compliant or the new indoor unit will not fit through the attic opening.
There is also a human side to this stage. If you are living in the house during the project, ask how much noise to expect, which rooms will be accessible, and whether your cooling or heating will be out for part of the day. If the crew needs to access the attic, closet, crawlspace, or garage, make those spaces available ahead of time. A small amount of preparation can save a large amount of frustration.
A realistic look at installation day
For many homeowners, installation day is the most visible part of the AC installation process, and it is usually the busiest. The crew arrives, reviews the plan, protects floors and nearby surfaces, shuts down the old equipment, and begins removal. If the old system is tightly packed, corroded, or hard to reach, removal can take longer than the first estimate suggested. That is normal. Real houses are not showroom spaces, and old systems often reveal a few surprises once the panels come off.
A basic replacement can sometimes be completed in a single day, especially when the indoor and outdoor equipment are straightforward swaps and the ductwork is already in decent shape. More complex jobs may take two days or more. If the project involves rerouting drain lines, updating electrical components, repairing sheet metal transitions, or replacing a furnace and air conditioner together, the timeline expands naturally. The goal is not speed for its own sake. The goal is a system that is installed cleanly enough to run efficiently and reliably.
During this phase, good technicians tend to work in a rhythm. One person may handle the old equipment removal while another prepares the new setting pad or air handler connections. Another may be focused on refrigerant lines, drainage, or combustion components if a furnace is involved. Homeowners sometimes interpret this as inefficiency because the crew is not all doing the same thing at once, but that is usually a sign of coordination, not confusion.
What can slow the job down
A replacement schedule is rarely delayed by one dramatic event. More often, it is the accumulation of small complications. A tight attic access point can slow the indoor unit swap. Corroded fasteners can make removal tedious. A previously hidden duct issue can demand a repair before the new system goes online. Electrical corrections, thermostat compatibility problems, and condensate drainage adjustments also show up often enough that experienced contractors plan for them.
Weather can affect the outdoor portion of the job too. Summer heat makes it harder on crews, and severe weather can interrupt work or delay delivery. Supply chain issues still matter in some regions, especially when a specific model, blower configuration, or control board is required. If the contractor explains that the HVAC replacement timeline includes some flexibility, that is usually a healthy sign. Overpromising exact timing on a project with several moving parts is how people get disappointed.
Homeowners can also create delays without meaning to. The most common issue is access. If furniture blocks the path to the indoor unit, or if the outdoor condenser area is covered with landscaping and stored items, the crew has to stop and wait. Another common issue is unprepared decision-making. If the job depends on a thermostat upgrade, an equipment placement decision, or a duct repair approval, and nobody is available to authorize it, work can pause for hours.
How to prepare for AC installation without overdoing it
You do not need to stage your home like a real estate listing, but a little planning goes a long way. The best preparation is practical and targeted. Clear the area around the indoor and outdoor equipment. Make sure the technicians can reach attic ladders, utility closets, breaker panels, and exterior service areas. If the system serves a basement, garage, or crawlspace, open those areas and remove anything fragile.
A few details often get overlooked. Put away valuables near the work zone, especially if the crew will need to carry old equipment through tight hallways. Secure pets in a safe room away from the noise and open doors. If you work from home, plan for interruptions because power may be shut off briefly during connections or testing. It is also smart to know where the thermostat is located and whether it will need to be replaced or reprogrammed.
Here is a short checklist that usually helps without turning your home upside down:
- Clear a path to all HVAC access points.
- Move stored items away from the indoor and outdoor units.
- Arrange a safe space for pets and children.
- Ask who will handle thermostat setup and cleanup.
- Keep phone access available in case the crew needs a quick decision.
That is enough for most homes. Anything beyond that depends on the layout and the scope of work.
The first startup is where quality becomes visible
The new HVAC system startup is the part that separates a decent install from a good one. Installation is not finished when the equipment is physically in place. Startup is when the technician verifies whether the system actually performs the way it should. The system is powered, the controls are checked, airflow is measured, temperatures are monitored, and the refrigerant circuit is evaluated. On heating equipment, combustion safety, venting, gas pressure, and ignition sequence also matter. On cooling systems, correct airflow and refrigerant charge are essential.
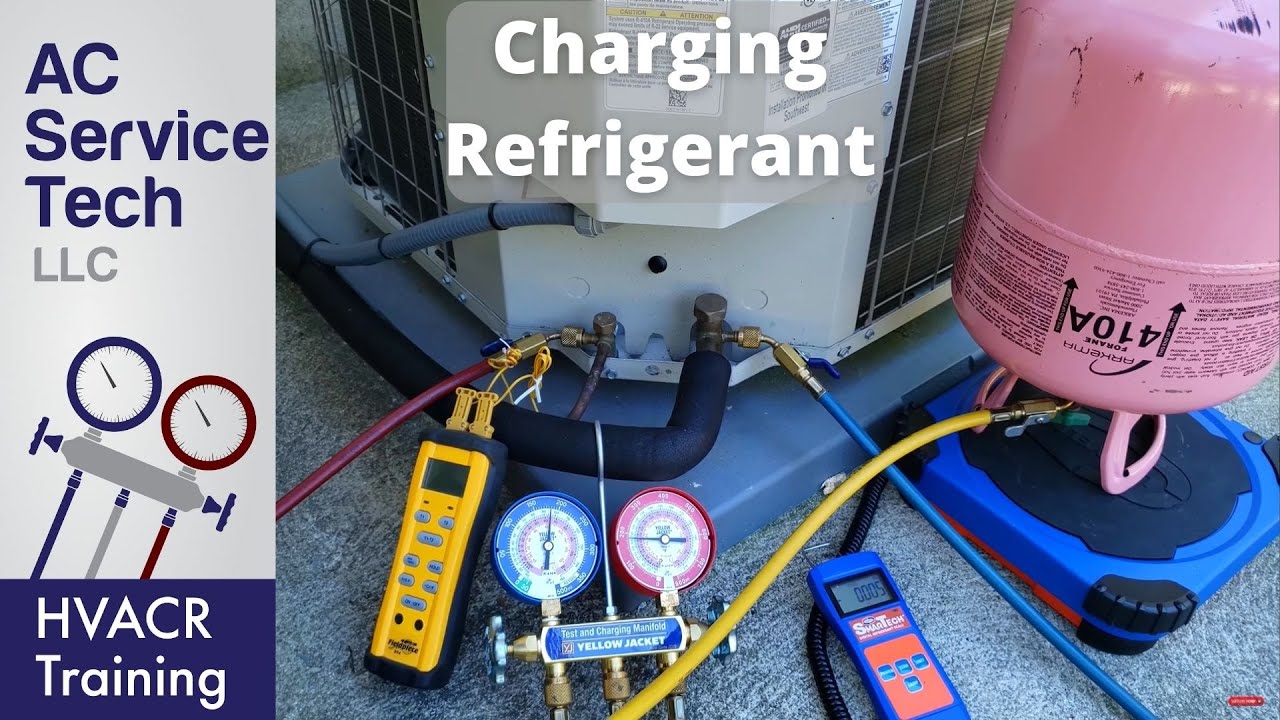
This phase can take anywhere from an hour to several hours depending on the complexity of the system and whether adjustments are needed. A rushed startup is a red flag. The technician should not simply turn the unit on, confirm that cold air comes out, and leave. A proper startup often involves fine-tuning. Duct restrictions, thermostat calibration, fan speed settings, and static pressure readings can all influence how the system feels in the house.
Homeowners sometimes notice that the air coming from the vents feels different on day one. That does not always mean something is wrong. A correctly sized and balanced system may run longer at lower intensity than the old one, which can feel unusual if you were used to short, noisy cycles. The room temperature may also stabilize more evenly than before, which can be a welcome change if certain rooms were always hot or cold.
What you should ask before the crew leaves
A finished installation should come with a clear handoff. The equipment is one thing, but the instructions matter too. You should know how to operate the thermostat, what filters the system uses, where the service disconnect is located, and what warning signs deserve attention. If the contractor provides a warranty explanation, keep those documents in a safe place. The same goes for permits, manuals, and model numbers.
This is a good moment to ask about the system’s normal operating pattern. Some new units cycle differently than older ones. Variable-speed blowers, communicating thermostats, and high-efficiency compressors can all behave in ways that look unfamiliar at first. Ask what normal sounds to expect and which ones are not normal. If the installer says the unit may need a follow-up adjustment after it has been running for a few days, that is reasonable. Homes settle into a new system differently once the weather changes and the ductwork warms or cools.
You should also ask about cleanup. The job should not end with debris in the yard, sheet metal scraps in the attic, or old insulation left in a utility space. A professional crew will usually remove the old equipment, dispose of packaging, and leave the work area in usable condition. Some dust is inevitable. A neglected mess is not.
The first week after replacement
The first several days after a replacement tell you a lot about the quality of the work. A well-installed system should run steadily, maintain set temperatures, and keep humidity under control within the limits of your climate and home design. Minor adjustments during the first week are not unusual. A thermostat setting may need refinement. Airflow may feel stronger in one room and weaker in another. That is where a return visit or a small correction can make a real difference.
This is also the period when homeowners notice whether the original problem has actually been solved. If the old system struggled because it was improperly sized or the coil was failing, the new system should feel calmer and more consistent. If comfort issues remain, the cause may be outside the equipment itself. Duct leakage, insulation gaps, poor return placement, and blocked registers can all create performance complaints that a new unit alone will not fix.
I have seen homeowners blame the new equipment for problems that were present long before replacement. That is why it helps to keep expectations grounded. A new system can improve efficiency, comfort, and reliability, but it cannot magically correct every weakness in the house. Sometimes the replacement reveals those weaknesses more clearly, which is useful information even if it is not the simplest news.
How the schedule differs by system and home
Not every HVAC replacement timeline looks the same. A straightforward central AC swap in a single-family home may move quickly if the infrastructure is sound and the equipment matches the existing layout. A full split-system replacement that includes furnace, coil, and condenser takes more coordination. Heat pump systems add their own set of electrical and control considerations. Homes with rooftop units, tight mechanical closets, or older ductwork can require extra labor just to make the physical connections.
Age matters too. In older homes, the original equipment may have been installed under different standards, and the new unit may need adapter parts or updated safety components. That can extend the schedule without indicating poor planning. It is simply the cost of doing the job correctly in a house Check out this site that has already been modified several times over the years.
There is a trade-off worth understanding here. A faster job is attractive, especially during hot weather, but a slightly longer timeline can allow for better workmanship. If the contractor is taking the time to seal duct transitions, test the startup carefully, and verify drainage, that time usually pays back in fewer service calls later.
Setting realistic expectations pays off
The most satisfied homeowners are usually the ones who know what the process will feel like, not just what it will cost. They understand that an HVAC replacement is part logistics, part craftsmanship, and part troubleshooting. They know there may be a day when the house is warm, the hallway is crowded, and the crew is moving equipment through the front entrance. They also know that the new system may need a little adjustment after the first startup, because careful work often includes fine-tuning.
If you are about to replace your system, think of the project in phases. There is the planning stage, where measurements and equipment choices happen. There is the installation stage, where the old system comes out and the new one goes in. Then there is the startup and adjustment stage, where the real performance of the system becomes visible. Each phase deserves attention. Each one affects the one after it.
When that sequence is handled well, the result is not just cooler air or better heat. It is a quieter house, more predictable comfort, and fewer emergency calls when the weather turns difficult. That is what a good replacement timeline is really for. It gives the project enough structure to finish cleanly, and enough flexibility to account for the reality of an actual home.
Phone:
(863) 247-0271
Website:
icecoolinghvac.com
Indoor Climate Experts
296 Lake Smart Circle,
Winter Haven,
FL
33881